
In this article, I'll talk about webhooks in general, why you'd want to use them with Discord, and how to build your own webhook provider using Serverless Cloud.
What are webhooks?
The term "webhook" typically refers to a request that is sent by a webhook provider to a specified endpoint after some kind of event, where it is then consumed by a webhook consumer. While there's no formal specification or standardization for webhooks, they're a commonly stumbled upon concept when learning about event notification architectures.
Polling versus webhooks
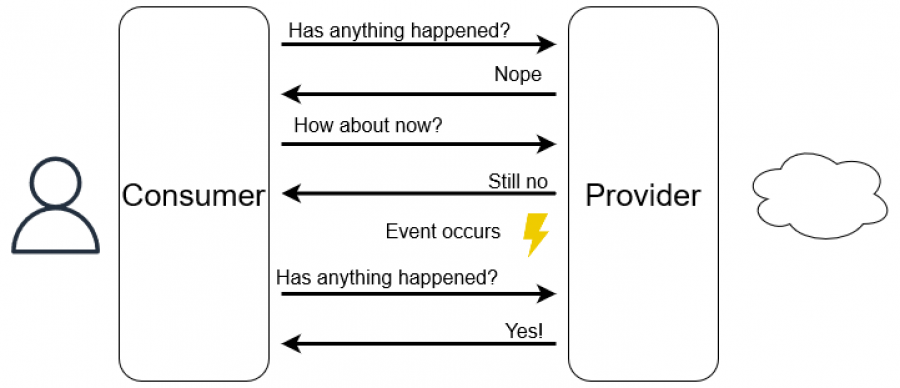
Another common pattern for determining if an event has happened is polling. In the diagram below, the consumer has to keep on sending requests to the provider to see if the state has changed. This can be a useful pattern, but it can also take up extra bandwidth and compute resources.
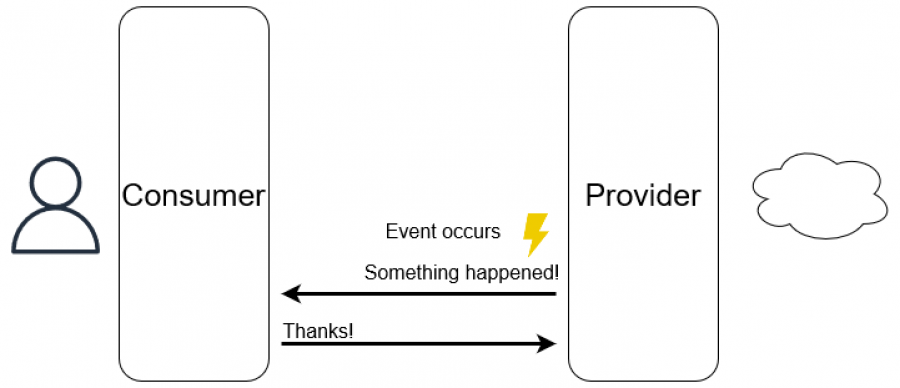
Using webhooks, on the other hand, only requires a single request-response cycle. This is because the provider is the one sending the request, not the consumer. In the next diagram, an event occurs and the provider immediately sends a request to the consumer, allowing them to process the data however they need to and send a response back.
This is a useful pattern because you could have tens, hundreds, or even thousands of consumers that want to be notified of an event. If you were to use a polling pattern, those costs of constantly sending network requests would quickly balloon.
Using webhooks with Discord
If you've used Discord before, you may have used (or even built) a Discord bot before. The usual pattern with bots is a user sending a command in a server's channel followed by a response from the bot. This provides a rich user experience, but what if we wanted a bot that just notifies us when certain things happen?
While it's perfectly feasible to build a Discord bot that sends notifications to a Discord channel, there's a lot of steps to get a bot set up. Another caveat is that Discord bots connect to a server via websockets, meaning they have to constantly be running in order to send us those notifications. This would consume resources while the bot idles, waiting for an event to happen.
Thankfully, Discord provides a way for us to easily set up webhook endpoints that we can send requests to, and Discord will handle the messaging for us. Here's how you can set it up:
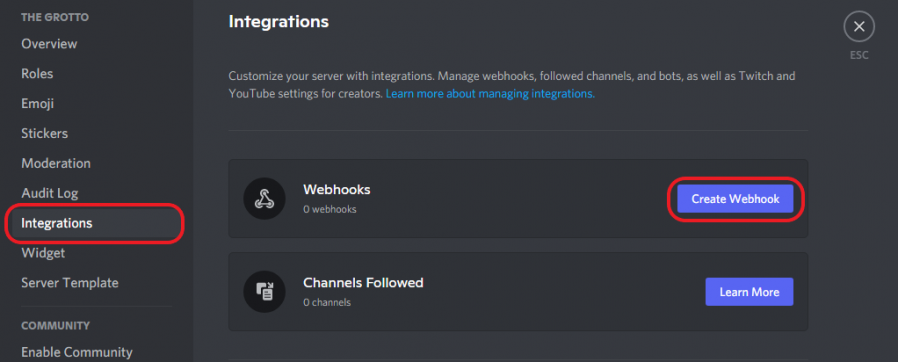
1) Go to your Discord server's settings, click the Integrations tab and then the Create Webhook button.
2) Then, you can give your "bot" a name that it will send messages under, along with a channel that it sends messages to.
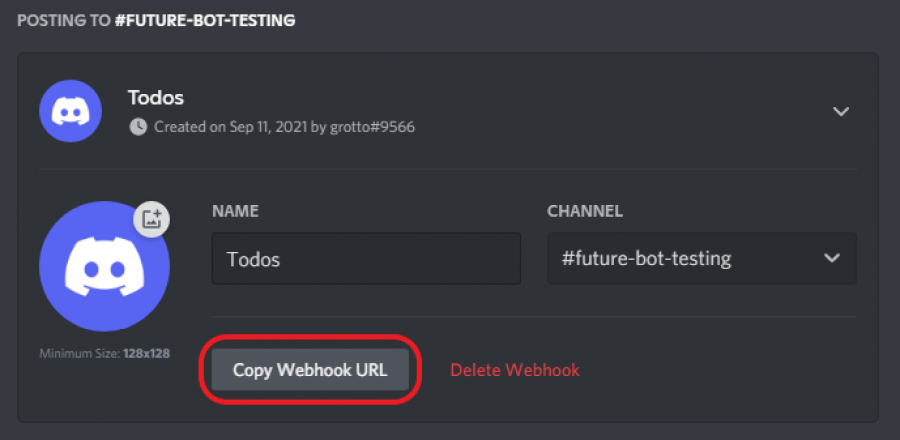
And voila! We now have a webhook URL that we can send requests to.
Setting up a Serverless Cloud service
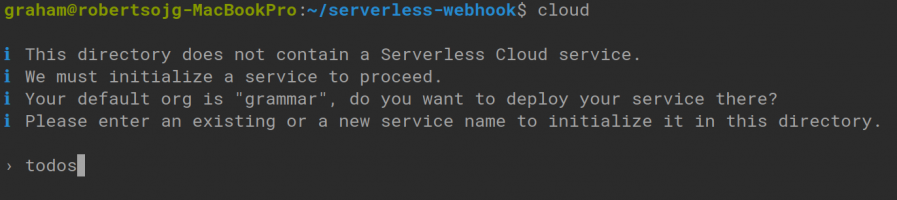
Assuming you've already gotten access to a Serverless Cloud account and installed the CLI, you're ready to set up a service. First, you'll want to make a new directory and then run cloud . This will scaffold the directory with a basic TODO application, so we'll just call our service "todos".
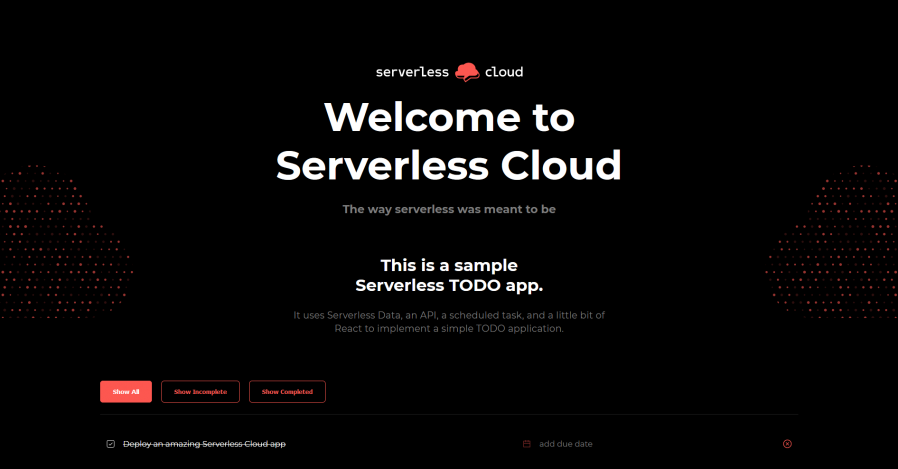
Once everything is provisioned, you can go to the provided URL to ensure your service is up and running.
If you want to, you can also test out your new service by running cloud test - as long as everything comes back green we're good to go!
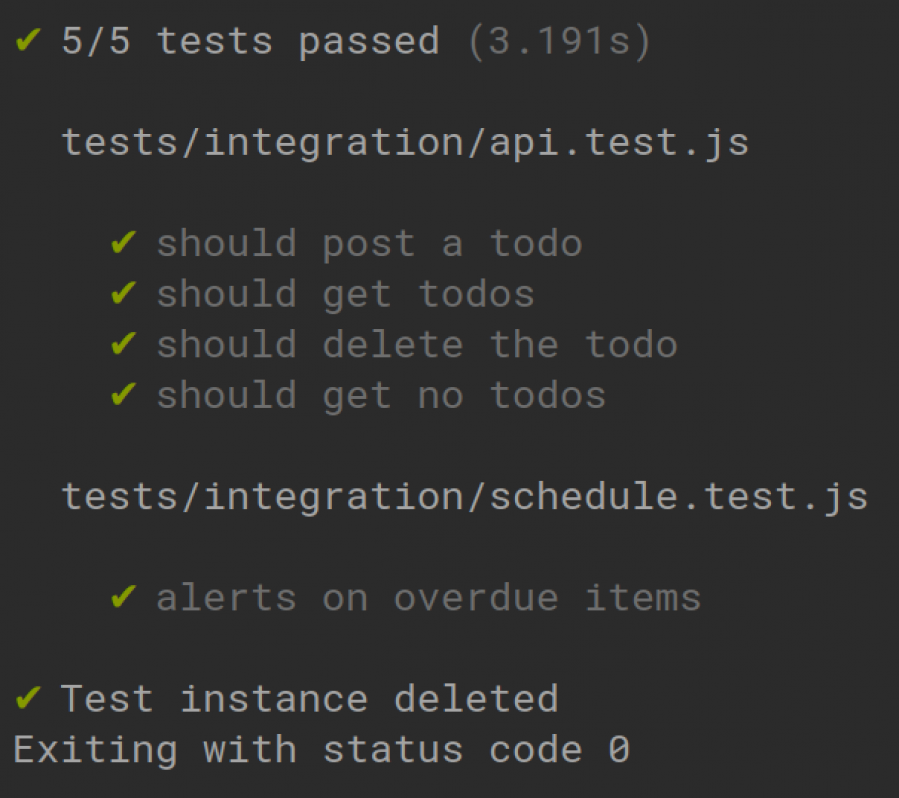
These also aren't just simple unit tests. Serverless Cloud will spin up a temporary instance and perform the testing in an environment that mimics production, ensuring that your code will work once it's fully deployed. It also uses test data within that instance, so no interfering with any other environment's data either.
Let's build our webhook provider on top of this todo application - a Discord bot that reminds us of our incomplete todo items every 2 hours. In the past, this would be a bit tedious, especially since we would have to set up a cron task (and wait it out to make sure it works). Luckily, Serverless Cloud makes scheduled tasks easy.
In index.js we can simply add a schedule.every invocation, like so:
schedule.every('2 hours', async () => {
  // todo
});
The anonymous callback function we pass to schedule.every will be executed, you guessed it, every 2 hours. The next thing we'll want to do is get our incomplete todo items. There's a helper function in index.js called getTodos, which allow us to easily retrieve the type of todo items we want.
const getTodos = async (status, meta) => {
  let result;
  if (status === 'all') {
    result = await data.get('todo:*', meta)
  } else if (status === 'complete') {
    result =  await data.getByLabel('label1','complete:*', meta)
  } else {
    result = await data.getByLabel('label1','incomplete:*', meta)
  }

  return {
    items: result.items.map(item => item.value)
  }
}
This helper function shows off the simplicity of Serverless Data as well. Data is a first-class citizen in Serverless Cloud, and is always easily accessible. Let's incorporate this helper into our scheduled task.
schedule.every('2 hours', async () => {
  let incompleteTodos = await getTodos('incomplete', {})
  let content;

  if (incompleteTodos.items.length === 0) {
    content = 'All todos complete!'
  } else {
    content = 'Incomplete todos:\n'
    incompleteTodos.items.forEach(todo => content += `- ${todo.name}\n`)
  }

  console.log(content)
});
In its current state, our task will log to the console:
Incomplete todos:
- Some todo
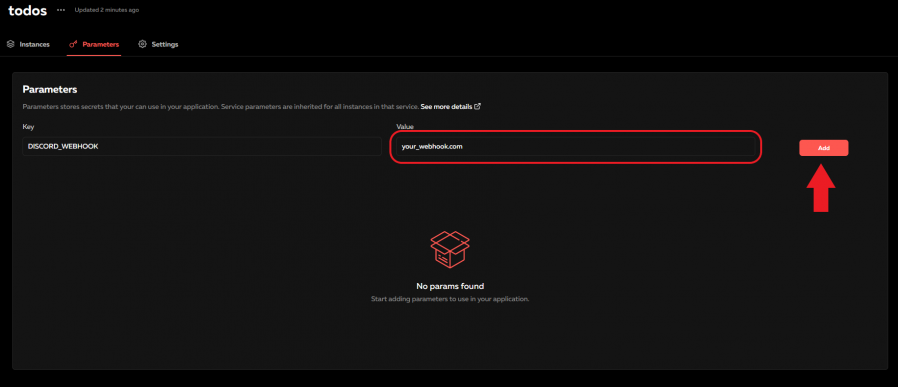
But we want to send this to our Discord channel. To do this, you'll need to set up what Serverless Cloud calls a Parameter. You can easily do this via the dashboard, and you'll want to copy and paste the Discord Webhook URL you set up earlier into the Value input box:
Then we'll need to send a POST request to that endpoint with a JSON object with the following structure:
{
	"content": "some message"
}
I'll be using the Axios library to handle sending this request. Our task now looks like this:
schedule.every('2 hours', async () => {
  let incompleteTodos = await getTodos('incomplete', {})
  let content;

  if (incompleteTodos.items.length === 0) {
    content = 'All todos complete!'
  } else {
    content = 'Incomplete todos:\n'
    incompleteTodos.items.forEach(todo => content += `- ${todo.name}\n`)
  }

  console.log(content)

  axios.post(params.DISCORD_WEBHOOK, {
      content,
    })
    .catch(error => {
      console.log(error)
    })
});
Notice the params.DISCORD_WEBHOOK being passed in to the axios.post method - this allows us to access the Parameter we set earlier.
Testing our new service
Thankfully, we don't have to sit around for two hours just to see if this scheduled task will work as intended. Navigate to tests/integration/schedule.test.js and you'll see that they've got a test suite for us already that tests an existing scheduled task. We can add our own test at the bottom like so:
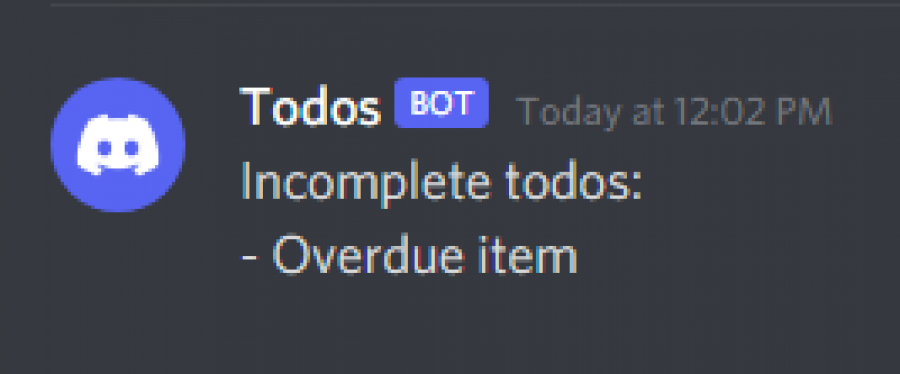
test("alerts on incomplete items", async () => {
  await schedule.every("2 hours").invoke();

  expect(log).toBeCalledWith("Incomplete todos:\n- Overdue item\n");
});
Once you've added that snippet, you should be able to run cloud test and see it come back fully green. It'll also send a request to our Discord Webhook URL so we can check our channel as well.
Deploying our service
Now that we know our service is functioning as intended, we can deploy it to a new environment using the command cloud deploy prod. This will create a new instance of our service that we can inspect in the dashboard:

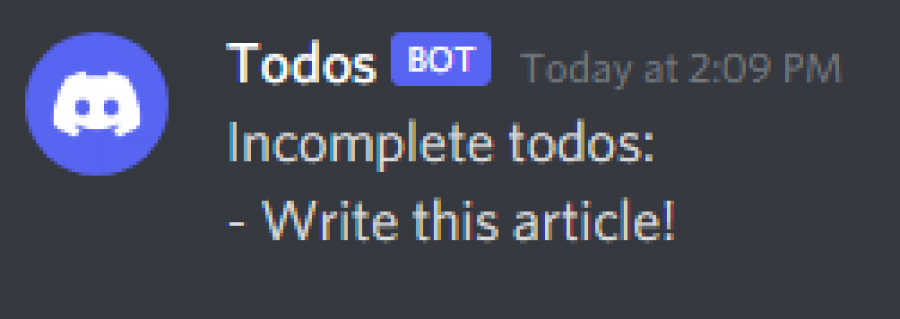
And now we can add a todo as well!

And after a little while, we should also get notified via Discord of our incomplete todo items.
Conclusion
Thanks for reading! I'm glad I had the time to play around with Serverless Cloud this weekend - it may be my new go to provider for weekend projects. Not only is it functional, it's also been delightful to work with, something I can't always say for other cloud providers.
